
How to Make Soap: Crafting Your Own Sudsy Creations
Are you ready to dive into the world of soap making? Whether you’re a seasoned DIY enthusiast or a complete beginner, this guide will take you through the exciting process of how to make soap from scratch. Get ready to unleash your creativity and discover the art of crafting beautiful, skin-loving soap bars that will leave you and your loved ones feeling pampered. Let’s embark on this soap-making adventure together!
Introduction: The Art and Science of Soap Making
Soap making is both an art and a science. It’s a delightful blend of creativity and precision that allows you to customize soap bars according to your preferences. By the end of this comprehensive guide, you’ll be equipped with the knowledge and skills needed to create your very own soap masterpieces.
Getting Started: Essential Ingredients and Equipment
Before we delve into the nitty-gritty of soap making, let’s gather everything you need. Here’s a list of essential ingredients and equipment to kickstart your soap-making journey:
Ingredients for Soap Making
- Base Oils: Choose a combination of oils such as olive, coconut, and palm for the soap’s foundation.
- Lye (Sodium Hydroxide): The key ingredient that transforms oils into soap.
- Water: Distilled water is best for soap making.
- Essential Oils: For fragrance and therapeutic benefits.
- Colorants: Natural additives like herbs, clays, or mica for color.
- Additives: Consider honey, oatmeal, or lavender buds for texture and aroma.
- Safety Gear: Goggles, gloves, and an apron to protect yourself.
Equipment for Soap Making
- Stainless Steel Pot: For mixing lye and oils.
- Thermometer: To monitor temperature.
- Digital Scale: For precise measurements.
- Stick Blender: Essential for emulsification.
- Molds: Choose from silicone or wooden molds.
- Plastic Spatula: For stirring and scraping.
- Curing Rack: A place to dry and cure your soap.
Now that we’ve gathered our supplies, let’s move on to the exciting part: making soap!
Make Soap: The Step-by-Step Process
Step 1: Safety First
Before we jump into the actual soap making, remember safety is paramount. Always wear your safety gear – goggles, gloves, and an apron. Ensure you’re working in a well-ventilated area, away from children and pets.
Step 2: Calculate Your Recipe
To create the perfect soap, you need a well-balanced recipe. Use a soap calculator to determine the precise amount of lye and water needed for your chosen oils. This step ensures your soap is safe and skin-friendly.
Step 3: Weigh and Mix
Measure your oils and lye-water solution accurately using a digital scale. Slowly add the lye to the water, stirring gently to dissolve it. Allow this mixture to cool.
Step 4: Combine Oils and Lye
Once both the lye-water solution and oils have reached a similar temperature, carefully pour the lye-water into the oils. Use a stick blender to blend them until they reach ‘trace,’ resembling a thin custard.
Step 5: Add Fragrance and Color
This is where your creativity shines. Stir in your chosen essential oils and colorants. Whether you opt for soothing lavender or zesty citrus, the choice is yours.
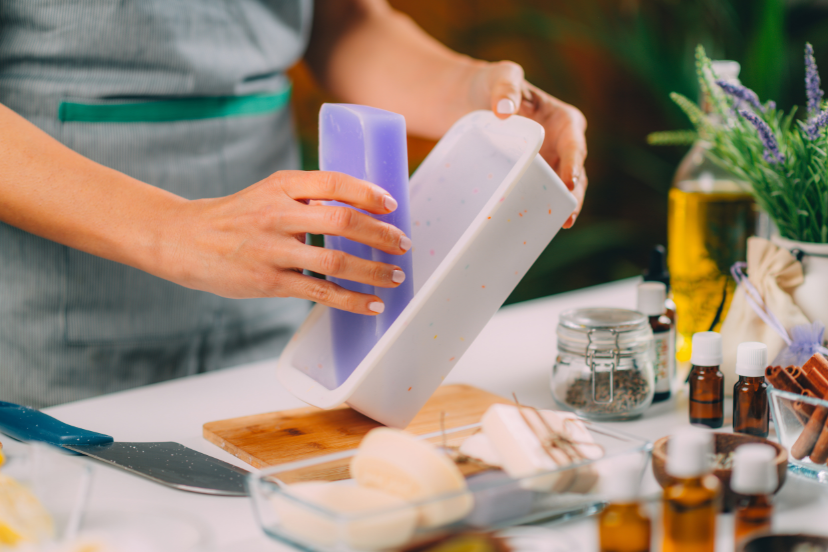
Step 6: Mold and Cure
Pour your soap mixture into molds and cover them with a lid or plastic wrap. Allow your soap to cure for 24-48 hours. Afterward, unmold and cut it into bars. Place the bars on a curing rack for 4-6 weeks to harden.
Step 7: The Unveiling
Congratulations! Your homemade soap is ready for use. Enjoy the satisfaction of using a product you created from scratch.
FAQs: Your Burning Soap-Making Questions Answered
FAQ 1: Is making soap at home safe?
Absolutely, as long as you follow safety precautions, wear protective gear, and use precise measurements.
FAQ 2: Can I use any oils for soap making?
Yes, you can experiment with various oils to create unique soap blends. Just ensure to run your recipe through a soap calculator.
FAQ 3: How do I add fragrance to my soap?
Essential oils are the best way to add fragrance. Start with a few drops and adjust according to your preference.
FAQ 4: What is the curing process, and why is it necessary?
Curing allows your soap to harden and mellow, making it gentler on the skin. It also ensures the lye is fully saponified.
FAQ 5: Can I make soap without lye?
No, lye is a crucial ingredient in soap making. However, when used correctly, it completely transforms into soap, making the final product safe for use.
FAQ 6: How can I troubleshoot common soap-making issues?
If you encounter problems like separation or incorrect fragrance, don’t worry. There are solutions for each issue, and experience will guide you.
Conclusion: Crafting Soap with Love
Learning how to make soap is a rewarding journey that combines science, artistry, and self-expression. With the right ingredients, equipment, and a bit of patience, you can create soap bars that cater to your skin’s needs and reflect your unique style.
So, what are you waiting for? Dive into the world of soap making, experiment with different recipes, and gift your loved ones with handmade, luxurious soap that shows you care. It’s time to unleash your inner soap artisan and let your creativity flow!
Now that you’ve learned the basics of soap making, put on your safety gear, gather your supplies, and embark on a soap-making adventure. Happy soaping!


