
A Step-by-Step Guide to Make Candles
Welcome, candle enthusiasts and craft aficionados, to a captivating journey into the world of candle making! Have you ever marveled at the soft, flickering glow of a candle and wondered about the secrets behind its creation? If so, you’re in for a treat! In this guide, we’re diving deep into the art of crafting your very own candles. From choosing the right materials to mastering various techniques, you’re about to embark on a creative endeavor that will not only illuminate your living space but also spark your creativity. So, without further ado, let’s roll up our sleeves, gather our supplies, and learn how to make candles that will light up your world!
Make Candles: Unleash Your Inner Artisan
Crafting candles is not just a hobby; it’s a magical process that allows you to infuse your personal touch into every piece. Whether you’re a complete beginner or a seasoned DIY enthusiast, making candles is an immensely rewarding experience that combines artistry and practicality. So, let’s get started on this exciting journey of creation!
Select Your Wax Wisely
The foundation of every candle lies in the wax you choose. There’s a delightful array of options out there, each with its unique qualities. From soy wax, known for its clean burn, to paraffin wax, which offers vibrant colors, your choice will impact the final product. Here’s a quick rundown:
| Wax Type | Pros | Cons |
|---|---|---|
| Soy Wax | Clean-burning, retains fragrance well | Can be a bit soft in warm conditions |
| Paraffin Wax | Excellent color options, affordable | Non-renewable, may produce soot |
| Beeswax | Natural, long burn time, sweet honey aroma | Pricey, limited color choices |
| Coconut Wax | Eco-friendly, good scent throw | Limited availability, can be tricky to use |
Gather Your Supplies
Before you dive into the mesmerizing world of candle making, ensure you have all the necessary supplies at hand. You wouldn’t want to halt your creative flow midway! Here’s a checklist to keep you on track:
- Wax (your chosen type)
- Wicks
- Fragrance oils or essential oils
- Dyes or colorants
- Melting pot
- Thermometer
- Stirring utensil
- Containers or molds
- Wick holder or chopsticks
- Adhesive (wick stickers or hot glue)
- Safety equipment (gloves, apron, goggles)
Ignite Your Creativity: Step-by-Step Candle Making Process
Now that you have your supplies ready, it’s time to dive into the candle making process. Follow these steps to create your own dazzling candles:
- Prepare Your Workspace: Find a clean, well-ventilated area to work in. Cover surfaces with newspapers or disposable tablecloths to catch any spills.
- Measure the Wax: Calculate the amount of wax you’ll need based on your chosen container or mold. Remember, it’s better to have a little extra wax than to run out midway.
- Melt the Wax: Use a double boiler or a microwave-safe container to melt the wax. Monitor the temperature with a thermometer and ensure it doesn’t overheat.
- Add Color and Fragrance: Once the wax is melted, add your chosen colorants and fragrance oils. Be creative with colors and scents that resonate with you.
- Secure the Wick: Attach the wick to the bottom of your container using a wick sticker or hot glue. Use a wick holder or chopsticks to keep the wick centered.
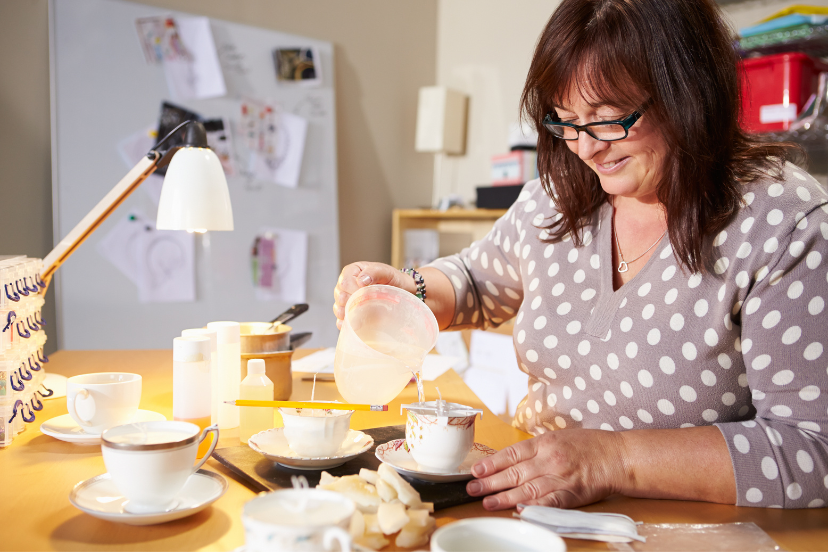
- Pour the Wax: Carefully pour the melted wax into your container. Leave some space at the top. Keep a small amount of melted wax aside.
- Center the Wick: As the wax cools slightly, re-center the wick to ensure it stays in place.
- Create a Well: Using the reserved melted wax, create a small well around the wick to prevent a sinkhole.
- Let It Cool: Allow your candle to cool and solidify. This may take a few hours.
- Trim the Wick: Once the candle is completely cool, trim the wick to about ¼ inch.
- Admire and Light: Your homemade candle is ready! Admire your handiwork and, when ready, light it up to bask in the warm glow.
Frequently Asked Questions
Q1: Can I use any container for candle making?
Absolutely! Upcycling old containers like jars or teacups can add a charming touch to your candles. Just ensure they’re heat-resistant and can hold melted wax.
Q2: How do I prevent air bubbles in my candles?
To avoid air bubbles, gently tap the container as you pour the wax. You can also use a heat gun to eliminate any trapped air.
Q3: Is candle making safe for kids?
Candle making involves working with hot wax, so it’s best suited for older kids under adult supervision.
Q4: Can I use crayons to color my candles?
While crayons may seem like a fun idea, they can clog the wick and produce uneven burns. It’s better to use candle-specific dyes.
Q5: Why is my candle tunneling?
Tunneling occurs when a candle burns straight down the center, leaving wax along the sides. To prevent this, ensure the first burn melts the wax across the entire surface.
Q6: How can I make my candles last longer?
For a longer burn time, allow the top layer of wax to fully melt during each use. This prevents tunneling and maximizes your candle’s lifespan.
Conclusion: Illuminate Your World with Handcrafted Brilliance
Congratulations, you’ve embarked on a delightful journey of candle making! As you’ve learned, creating candles is more than just melting wax; it’s about expressing your creativity, infusing scents that inspire, and crafting pieces that radiate warmth and charm. Whether you’re making candles as thoughtful gifts or to enhance your home’s ambiance, each step you take adds a touch of your unique style. So go ahead, gather your supplies, and immerse yourself in the art of making candles. Illuminate your world with the brilliance of your own handcrafted creations – the possibilities are as endless as the warm, inviting glow of a candlelit room.


