
Knitting for Beginners: Unleash Your Creativity with Yarn and Needles
Introduction
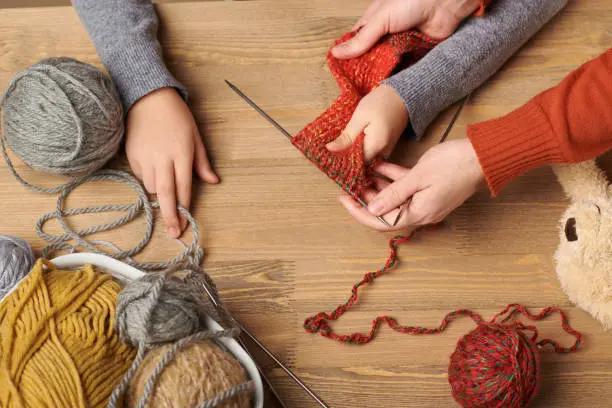
Welcome to the wonderful world of knitting! If you’ve ever admired cozy scarves, warm blankets, or intricate sweaters and wondered how they were made, you’re about to embark on a delightful journey. In this knitting for beginners, I’ll share helpful suggestions and tips to get you started with this timeless craft. Whether you’re seeking a new hobby, a way to relax, or a creative outlet, knitting offers endless possibilities. So, grab your yarn and needles, and let’s dive into the world of knitting!
1. Why Knitting? Discover the Magic of Yarn and Needles
Knitting is a craft that has captivated people for centuries. From the therapeutic benefits to the joy of creating something with your own hands, knitting offers numerous reasons to dive into this world of yarn and needles. Discover the magic of knitting and find out why it has become a beloved pastime for many.
2. Getting Started: Essential Tools and Materials
When it comes to knitting for beginners, having the right tools and materials is crucial for a successful and enjoyable experience. In this section, we’ll explore the essential items you’ll need to get started on your knitting journey.
2.1 Choosing the Right Needles
One of the first decisions you’ll need to make as a beginner knitter is choosing the right knitting needles. Needles come in various materials, lengths, and sizes, each suited for different types of projects and yarn weights.
Material: Knitting needles can be made of different materials, including wood, metal, plastic, and bamboo. Each material has its own unique characteristics. Wooden needles, for example, provide a warm and natural feel, while metal needles offer smooth and fast knitting. Consider trying different types to see which ones you prefer.
Length: Needles come in different lengths, typically ranging from 9 to 16 inches (23 to 41 cm). Shorter needles are ideal for smaller projects like hats or sleeves, while longer needles are more suitable for larger projects such as blankets or shawls.
Size: Needle size is denoted by a number or letter and determines the size of the stitches you’ll create. The size you choose depends on the thickness or weight of the yarn you plan to use. Thicker yarns require larger needles, while thinner yarns need smaller ones. Look for the recommended needle size on the yarn label or consult a needle size conversion chart.
As a beginner, it’s recommended to start with a medium-sized pair of straight knitting needles, around 10 inches (25 cm) long. These are versatile and comfortable to work with, allowing you to practice various stitches and techniques.
2.2 Selecting the Perfect Yarn
Yarn is the heart and soul of knitting, and choosing the right yarn for your project is essential. With a vast array of colors, textures, and fibers to choose from, the possibilities are endless. Here are some factors to consider when selecting yarn:
Yarn Weight: Yarn is categorized into different weights, ranging from lace to super bulky. The weight determines the thickness of the yarn and plays a role in the finished look and feel of your project. As a beginner, it’s best to start with medium-weight yarn (known as worsted or aran weight) as it is versatile and widely available.
Fiber Content: Yarns can be made from various fibers such as wool, cotton, acrylic, alpaca, and more. Each fiber has its own characteristics, including warmth, softness, durability, and drape. Consider the qualities you desire in your finished project and choose a fiber that matches your preferences.
Color and Texture: Yarn comes in an array of colors and textures, allowing you to unleash your creativity. Consider the color palette you’re drawn to and the texture that would best suit your project. Smooth yarns are great for showcasing intricate stitch patterns, while textured yarns can add depth and interest to simple designs.
When starting out, opt for a yarn that is labeled as “beginner-friendly” or “easy care.” These yarns are often soft, easy to work with, and forgiving of beginner mistakes. Additionally, choose light or medium shades as they make it easier to see your stitches as you learn.
2.3 Must-Have Accessories for Knitting
In addition to needles and yarn, there are a few essential accessories that will make your knitting experience smoother and more enjoyable:
Scissors: A pair of small, sharp scissors is essential for cutting yarn. Keep them handy in your knitting bag.
Tape Measure: A flexible tape measure helps you accurately measure your gauge, check the size of your project, or take body measurements for custom-fitted garments.
Yarn Needles: Yarn needles, also known as tapestry needles, are used for weaving in loose ends and sewing seams together. Choose a needle with a large eye that can accommodate the yarn you’re working with.
Stitch Markers: Stitch markers are small, circular markers that help you keep track of specific stitches or pattern repeats. They can be helpful for more complex projects or when learning new techniques.
Row Counter: A row counter is a handy tool for keeping track of the number of rows you’ve knitted, especially in projects with multiple pattern repeats or shaping.
Knitting Bag: A sturdy and spacious knitting bag is a great investment to keep your needles, yarn, and accessories organized and portable. Look for a bag with compartments or pockets to keep everything neat and easily accessible.
By having these essential tools and materials at hand, you’ll be well-prepared to embark on your knitting journey. Remember, knitting is a craft that rewards practice and patience, so embrace the learning process and enjoy the tactile joy of working with yarn and needles.
3. Learning the Basics: Casting On, Knit, and Purl Stitches
Now that you have your knitting needles and yarn ready, it’s time to dive into the basics of knitting. In this section, we’ll cover the fundamental techniques of casting on, knit stitches, and purl stitches. These skills form the building blocks of most knitting projects and will set you on the path to creating beautiful fabric with your own hands.
3.1 Casting On: Creating the Foundation
Casting on is the first step in starting any knitting project. It creates the foundation row of stitches on your needle. There are various methods of casting on, but we’ll cover the most common one here, known as the long-tail cast-on:
1. Hold the yarn in your left hand and leave a tail that’s approximately three times the width of your finished project. Place the tail over your thumb and the working yarn (connected to the ball of yarn) over your index finger.
2. Create a slipknot by making a loop with the tail end of the yarn. Insert your needle through the loop from front to back and pull the yarn gently to tighten the knot around the needle. Place the loop on your left-hand needle.
3. Hold the needle with the slipknot in your right hand. Insert the tip of your right-hand needle into the loop from front to back.
4. With your right index finger, scoop the working yarn (connected to the ball of yarn) under the left-hand needle, creating a new loop on the right-hand needle. This new loop becomes the first stitch.
5. Repeat steps 3 and 4 until you have cast on the desired number of stitches for your project. Each time you create a new loop, it counts as one stitch.
Practice this casting on method until you feel comfortable with the technique. There are other casting on methods you can explore as you advance in your knitting journey, such as the knitted cast-on or the provisional cast-on.
3.2 Knit Stitch: Creating a Smooth V-Shaped Stitch
The knit stitch (abbreviated as “k” in patterns) is the most basic and commonly used stitch in knitting. It creates a smooth fabric with a “V” shape on the right side of your work. Follow these steps to knit:
1. Hold the needle with the cast-on stitches in your left hand. Insert the right-hand needle into the first stitch from left to right, going through the front leg of the stitch.
2. With the working yarn in your right hand, bring it from back to front between the two needles.
3. Using the tip of the right-hand needle, catch the working yarn and bring it through the stitch, sliding the stitch off the left-hand needle.
4. You now have one knitted stitch on your right-hand needle. Repeat steps 1 to 3 for each stitch across the row.
Practice knitting until you feel comfortable with the motion and tension of the stitches. Pay attention to keep your tension consistent to achieve an even fabric. Remember, practice makes perfect, and the more you knit, the more natural and fluid your movements will become.
3.3 Purl Stitch: Creating a Raised Horizontal Bar
The purl stitch (abbreviated as “p” in patterns) is another essential stitch in knitting. It creates a textured fabric with a raised horizontal bar on the right side of your work. Here’s how to purl:
1. Hold the needle with the knitted stitches in your left hand. Insert the right-hand needle into the first stitch from right to left, going through the front leg of the stitch.
2. With the working yarn in your right hand, bring it from front to back between the two needles.
3. Using the tip of the right-hand needle, catch the working yarn and bring it through the stitch, sliding the stitch off the left-hand needle.
4. You now have one purled stitch on your right-hand needle. Repeat steps 1 to 3 for each stitch across the row.
The purl stitch is the reverse of the knit stitch, so if you can knit, you can purl! Practice alternating between knitting and purling to create different stitch patterns and textures in your projects.
These are the foundational techniques of knitting: casting on, knitting, and purling. With these skills under your belt, you can start exploring a wide range of patterns and projects. Take your time to practice each technique until you feel confident before moving on to more advanced stitches and patterns. Remember, knitting is a journey of continuous learning and improvement, so enjoy the process and have fun with your newfound skills!
4. Exploring Basic Projects: Scarves, Dishcloths, and Beyond
Now that you have mastered the fundamental knitting techniques, it’s time to put your skills to use and start creating some simple and satisfying projects. In this section, we’ll explore a few basic projects that are perfect for beginners: scarves, dishcloths, and beyond.
4.1 Scarves: A Classic Knitting Project
Scarves are a classic knitting project that not only keep you warm but also provide an excellent canvas for practicing different stitch patterns and techniques. Here’s how to get started on your first scarf:
1. Choose a soft and medium-weight yarn in a color or texture that speaks to you. Worsted weight yarn is a great option for scarves as it is easy to work with and creates a cozy fabric.
2. Determine the width and length you want for your scarf. A typical width is around 6 to 8 inches (15 to 20 cm), but feel free to adjust it according to your preference. For the length, consider if you want a short, neck-warming scarf or a long, wrap-around style.
3. Cast on the desired number of stitches using the long-tail cast-on method we covered earlier. Aim for an even number of stitches to make it easier to create symmetrical patterns.
4. Start by knitting every row (known as garter stitch) for a simple and reversible texture. Alternatively, you can experiment with other stitch patterns such as ribbing, seed stitch, or simple lace patterns to add more interest to your scarf.
5. Continue knitting until your scarf reaches the desired length. Remember to leave a long enough tail of yarn for binding off at the end.
6. Once you reach the desired length, bind off your stitches to secure them. Use a basic knit bind-off or explore other bind-off techniques for a decorative edge.
Scarves are versatile projects that allow you to explore different stitch patterns and techniques while creating a beautiful and functional accessory. Don’t be afraid to experiment and let your creativity shine!
4.2 Dishcloths: Practical and Quick-to-Knit
Dishcloths, also known as washcloths, are excellent projects for beginners as they are small, quick to knit, and serve a practical purpose. They are perfect for practicing stitch patterns and honing your knitting skills. Here’s how to knit a simple dishcloth:
1. Choose a durable and absorbent cotton yarn in a color that brightens up your kitchen. Look for a worsted weight cotton yarn that is easy to clean and can withstand frequent use.
2. Cast on around 30 to 40 stitches, depending on how large you want your dishcloth to be. You can experiment with different stitch patterns or keep it simple with a basic garter stitch (knit every row) or stockinette stitch (knit one row, purl one row).
3. Knit in your chosen stitch pattern until the dishcloth reaches your desired size. You can make it square or rectangular, depending on your preference.
4. Once you’re satisfied with the size, bind off the stitches and weave in any loose ends. Trim the yarn, and your dishcloth is ready to be put to use!
Dishcloths are not only practical but also make great gifts or additions to your own kitchen. Feel free to explore different stitch patterns, color combinations, or even incorporate some texture to make your dishcloths unique and interesting.
4.3 Beyond Scarves and Dishcloths: Hats, Baby Blankets, and Simple Shawls
Once you’ve gained more confidence in your knitting abilities, you can venture into slightly more challenging projects that still fall within the realm of beginner-friendly. Here are a few ideas to expand your knitting repertoire:
– Hats: Hats are great projects for practicing knitting in the round. Choose a hat pattern that matches your skill level and experiment with different stitch patterns and colors.
– Baby Blankets: Knitting a baby blanket is a rewarding project that allows you to create a cherished heirloom. Choose a soft and washable yarn and explore simple stitch patterns or stripes to add visual interest.
– Simple Shawls: Shawls are versatile accessories that can be worn in various ways. Look for simple shawl patterns that use basic stitches and gradually introduce you to lace or cable techniques.
As you tackle these projects, don’t be afraid to push your boundaries and try new techniques. Take advantage of the abundant online resources, knitting communities, and video tutorials available to help you along the way. With each project you complete, your knitting skills will continue to grow, and you’ll be ready to take on more complex and intricate patterns in no time!
In conclusion, knitting offers endless possibilities for creativity and self-expression. By starting with basic projects like scarves, dishcloths, and then gradually exploring more advanced patterns, you’ll develop your skills and confidence as a knitter. Enjoy the process, embrace the learning curve, and let your imagination run wild as you create beautiful hand-knit items. Happy knitting!
FAQs
1. Can I use any type of yarn for knitting dishcloths?
Yes, you can use various types of yarn for dishcloths. However, cotton yarn is a popular choice due to its absorbency and durability. Avoid using yarns with high synthetic fiber content, as they may not be as absorbent.
2. How long does it typically take to knit a scarf?
The time it takes to knit a scarf depends on factors such as the length, width, complexity of the stitch pattern, and your knitting speed. As a beginner, it may take a few weeks to complete a scarf, but with practice, you’ll become faster.
3. What is the best stitch pattern for a beginner knitter?
Garter stitch (knitting every row) and stockinette stitch (knit one row, purl one row) are excellent stitch patterns for beginners. They provide a solid foundation and allow you to focus on practicing the basic stitches.
4. Are circular needles necessary for knitting hats?
Circular needles are not necessary for all hat patterns, but they are commonly used for knitting hats in the round. They eliminate the need for seams and allow you to knit in a continuous spiral.
5. How can I fix mistakes in my knitting?
Mistakes happen to everyone, even experienced knitters. To fix mistakes, you can unravel the stitches back to the error and re-knit them correctly. Alternatively, you can use a crochet hook to fix specific stitches without unraveling the entire project.5. Taking Your Skills Further: Beyond the Basics
Once you’ve mastered the basics, you can expand your knitting repertoire by exploring advanced stitches and techniques. From intricate lace patterns to textured cables, these techniques add depth and complexity to your knitting projects.
6. Finding Inspiration and Resources
Finding inspiration and accessing valuable resources is crucial for nurturing your knitting journey and expanding your skills. In this section, we’ll explore various avenues to seek inspiration and discover helpful knitting resources.
6.1 Online Communities and Social Media
Online communities and social media platforms offer a wealth of inspiration, support, and resources for knitters of all levels.
Solution: Here are some ways to leverage online communities and social media:
1. Join Knitting Groups: Look for knitting groups on platforms like Facebook or Reddit. These communities provide a space to connect with fellow knitters, share projects, ask questions, and seek advice.
2. Follow Knitting Blogs and Websites: Many talented knitters share their expertise, patterns, and tips through blogs and websites. Explore popular knitting blogs or websites that align with your interests to gather ideas and insights.
3. Instagram and Pinterest: Follow knitting-related accounts on Instagram and create boards on Pinterest to save patterns, tutorials, and design ideas. These platforms are visual-centric and can serve as a constant source of inspiration.
4. YouTube Tutorials: YouTube is a treasure trove of knitting tutorials, from basic stitches to complex techniques. Search for specific techniques or patterns, and you’ll find step-by-step video guides that can enhance your skills.
5. Online Knitting Classes: Consider enrolling in online knitting classes or workshops. Websites like Craftsy (now known as Bluprint) or Udemy offer a wide range of courses taught by experienced instructors, covering everything from beginner basics to advanced techniques.
6.2 Knitting Books and Magazines
Traditional printed resources such as books and magazines are still valuable sources of inspiration and knowledge for knitters.
Solution: Here’s how you can utilize knitting books and magazines:
1. Knitting Books: Invest in a few essential knitting books that cover a range of techniques, stitch patterns, and projects. Books written by renowned knitting experts provide detailed instructions, patterns, and tips to enhance your knitting skills.
2. Knitting Magazines: Subscribe to knitting magazines or purchase individual issues for a regular dose of patterns, tutorials, and articles. Magazines often feature new designs, interviews with designers, and helpful tips and tricks.
3. Pattern Collections: Look for pattern collections or compilations that focus on specific themes or types of projects. These collections can be a great resource when you’re looking for inspiration or a specific pattern.
4. Knitting Reference Guides: Consider getting a knitting reference guide that provides comprehensive information on techniques, stitch patterns, yarns, and troubleshooting. These guides serve as valuable references when you need quick answers or in-depth knowledge.
6.3 Local Knitting Groups and Workshops
Engaging with the local knitting community can provide you with opportunities to learn, share experiences, and find inspiration.
Solution:** Explore these options to connect with local knitters:
1. Knitting Guilds: Research if there are any local knitting guilds or associations in your area. These organizations often host meetings, workshops, and events where you can learn from experienced knitters and build connections within the knitting community.
2. Local Yarn Shops: Visit local yarn shops and inquire about knitting groups or classes they may offer. Yarn shops are often hubs for knitters to gather, share their projects, and receive guidance.
3. Workshops and Retreats: Keep an eye out for knitting workshops or retreats held in your area. These events bring together knitters of all levels to learn from skilled instructors, expand their knowledge, and connect with fellow knitting enthusiasts.
4. Community Centers and Libraries: Check if your local community centers or libraries host knitting groups or classes. These free or low-cost gatherings provide opportunities to learn, share skills, and meet other knitters in your community.
Remember, finding
inspiration is a personal journey, and different sources may resonate with you more than others. Explore various avenues and experiment to discover what ignites your passion for knitting.
FAQs
1. How do I overcome a creative block in knitting?
If you’re experiencing a creative block, try browsing knitting patterns, experimenting with different yarns, or taking a break and engaging in other creative activities. Sometimes, stepping away from knitting for a while can reignite your inspiration.
2. Are there knitting apps available for pattern searching?
Yes, there are knitting apps available that allow you to search and access a vast library of knitting patterns. Some popular knitting apps include Ravelry, Knit Companion, and LoveCrafts.
3. Can I sell knitted items made from patterns I find online or in books?
The legality of selling knitted items made from patterns you find online or in books depends on the individual pattern’s copyright restrictions. It’s important to respect the copyright of the pattern designer and abide by any licensing terms specified.
4. How can I find knitting patterns for specific projects?
You can find knitting patterns for specific projects by searching online platforms like Ravelry, which have extensive pattern databases. You can also explore knitting books, magazines, and websites that often provide patterns categorized by project type.
5. What should I do if I encounter a mistake in a knitting pattern?
If you encounter a mistake in a knitting pattern, try searching for errata online. Many pattern designers or publishers provide corrections for errors in their patterns. If you can’t find any errata, reach out to the designer or seek help from the knitting community to clarify and resolve the issue.
7. Common Challenges and Solutions
While knitting can be a relaxing and enjoyable craft, it’s not uncommon to encounter challenges along the way. Don’t fret! In this section, we’ll discuss some common knitting challenges and provide solutions to help you overcome them.
7.1 Tension Issues: Too Tight or Too Loose Stitches
One of the most common challenges beginners face is maintaining consistent tension in their knitting. Tension refers to how tightly or loosely you hold the yarn while knitting. Inconsistent tension can result in stitches that are either too tight or too loose, affecting the overall appearance and drape of your project.
Solution: Practice, practice, practice! Achieving consistent tension comes with experience. Here are a few tips to help you improve your tension:
– Relax: Keep your hands and fingers relaxed while knitting. Tension often arises from gripping the yarn and needles too tightly.
– Gauge Swatch: Before starting a project, create a small gauge swatch using the recommended yarn and needle size. This allows you to check your tension and make any necessary adjustments before diving into the actual project.
– Adjust Needle Size: If your stitches are consistently too tight, try switching to larger needles. Conversely, if your stitches are consistently too loose, go down a needle size.
– Pay Attention: Be mindful of your tension as you knit. Take breaks, relax your hands, and check periodically if your stitches are consistent in size and appearance.
7.2 Dropped Stitches: Oops, I Lost a Stitch!
Dropped stitches happen when a stitch slips off the needle accidentally, resulting in a gap in your knitting. It can be frustrating, especially if you don’t notice it right away.
Solution: Don’t panic! Here’s what you can do to fix a dropped stitch:
– Identify the Dropped Stitch: Carefully examine your knitting to locate the dropped stitch. It will look like a vertical ladder with a loop of yarn.
– Rescue the Dropped Stitch: Insert a crochet hook or spare knitting needle into the loop of the dropped stitch from front to back. Use the hook or needle to pick up the loop and place it back on the left-hand needle. Continue knitting as usual.
– Prevent Dropped Stitches: To prevent dropped stitches, it’s essential to count your stitches regularly and double-check your work after each row. If you notice a gap, address it immediately to avoid unraveling further.
7.3 Fixing Mistakes: Undoing and Correcting
Making mistakes is part of the learning process in knitting. Whether it’s a wrong stitch, a missed increase, or a misread pattern, you’ll likely encounter errors at some point.
Solution: Here’s how to fix common mistakes in knitting:
– Undo and Redo: If you catch a mistake in the current row or a few rows back, carefully unravel the stitches until you reach the mistake. Then, one by one, re-knit the stitches correctly.
– Lifelines: To prevent extensive unraveling, consider using lifelines. A lifeline is a thin piece of contrasting yarn threaded through a row of stitches. If you make a mistake, you can unravel to the lifeline and re-knit from there.
– Tinking: “Tinking” is knitting spelled backward. It refers to undoing stitches one by one. If you only need to fix a few stitches, tink backward through your work to correct the mistake.
– Drop and Fix: In some cases, it may be easier to deliberately drop a few stitches to fix an error. Once the dropped stitches are safely secured, you can re-knit them correctly.
Remember, mistakes are opportunities to learn and grow as a knitter. Don’t be discouraged by them, but instead embrace them as valuable lessons along your knitting journey
7.4 Yarn Tangles: Untangling the Knots
Yarn tangles and knots can be frustrating and time-consuming, interrupting your knitting flow.
Solution: Try these tips to untangle your yarn:
– Patience: Take a deep breath and approach the tangle with patience. Yanking or pulling forcefully will only make it worse.
– Start from the Ends: Begin by identifying the loose ends of the tangle. Gently separate the strands, working your way from the outermost layers toward the center.
– Loosen and Untwist: If the tangle is tightly wound, loosen it by gently pulling the strands apart. Then, untwist the strands, one at a time, until the tangle is resolved.
– Wind into a Ball: Once the tangle is untangled, wind the yarn into a neat ball to prevent further knots and tangles.
To avoid tangles in the first place, store your yarn properly in a yarn bowl or project bag, keeping it away from pets, children, and potential snags.
7.5 Reading and Understanding Patterns: Decoding the Instructions
As you progress to more complex knitting projects, you’ll encounter patterns with various abbreviations, charts, and instructions that can be overwhelming to decipher.
Solution: Follow these steps to understand and decode knitting patterns:
– Read the Pattern Carefully: Start by reading the pattern from beginning to end, familiarizing yourself with the structure and terminology used.
– Abbreviation Key: Most patterns include an abbreviation key that explains the meaning of the abbreviations used. Refer to it whenever you encounter an unfamiliar abbreviation.
– Take It Step by Step: Break down the pattern into smaller sections or rows. Read each instruction one at a time, ensuring you understand it before moving on to the next.
– Visualize: If the pattern includes a chart, use it as a visual aid to understand the stitch patterns and how they come together.
– Seek Help: If you’re struggling to understand a pattern, don’t hesitate to seek help from experienced knitters, online forums, or video tutorials. Often, someone can provide clarification or offer tips to make the instructions clearer.
Remember, even experienced knitters sometimes need to unravel a few rows due to misread patterns or mistakes. Take your time, stay organized, and trust your abilities. With practice, pattern reading will become easier and more intuitive.
In conclusion, knitting is a journey filled with challenges, but with patience, practice, and the right mindset, you can overcome any obstacles that come your way. Embrace mistakes as learning opportunities, seek guidance when needed, and celebrate your progress. Happy knitting!
FAQs
1. How do I avoid holes at the beginning of a row?
To avoid holes at the beginning of a row, make sure to snug up the first stitch by gently pulling the working yarn after knitting or purling the first stitch. This helps to close the gap between the first and second stitches.
2. Why does my knitting curl at the edges?
Curling at the edges, also known as curling stockinette, is a common issue in knitting. It happens because the knit stitches on one side of the fabric are wider than the purl stitches on the other side. To prevent curling, consider adding a border or using techniques like ribbing or garter stitch at the edges.
3. How do I fix a twisted stitch?
If you notice a twisted stitch in your work, you’ll need to unravel it and re-knit it correctly. Carefully undo the stitch until you reach the twisted one, insert the needle through the stitch in the correct orientation, and re-knit it. Make sure the stitch lies flat and matches the surrounding stitches.
4. What can I do if my project ends up too small or too big?
If your project ends up too small, you can try blocking it, which involves wetting or steaming the finished piece to relax the fibers and adjust the size. If your project is too big, you may need to start over with a smaller needle size or adjust your tension.
5. How do I weave in yarn ends to prevent them from unraveling?
To weave in yarn ends, use a tapestry needle to thread the yarn tail through the stitches on the wrong side of the fabric, going back and forth to secure it. This helps to prevent the ends from coming undone over time.
8. Caring for Your Knitted Creations
Once you’ve poured your time and effort into creating beautiful knitted pieces, it’s essential to care for them properly to ensure their longevity and maintain their appearance. In this section, we’ll explore some tips and guidelines for caring for your knitted creations.
8.1 Washing and Blocking
Proper washing and blocking are essential steps in caring for your knitted items. Washing helps to remove dirt, oils, and odors, while blocking helps to shape and even out the stitches.
Solution: Follow these steps for washing and blocking your knitted creations:
1. Read the Label: Always refer to the yarn label for specific care instructions. Some yarns may require handwashing, while others are machine washable.
2. Handwashing: Fill a basin or sink with lukewarm water and add a mild detergent suitable for delicate garments. Gently submerge your knitted item in the water, allowing it to soak for a few minutes. Gently squeeze the fabric to distribute the soapy water, then rinse thoroughly with clean water.
3. Machine Washing: If your knitted item is machine washable, place it in a mesh laundry bag or pillowcase to protect it from snagging. Use a gentle or delicate cycle with cold water and a mild detergent. Avoid using bleach or harsh chemicals.
4. Blocking: Blocking helps to shape your knitted item and even out the stitches. Lay your washed item on a clean towel and gently press out excess water. If you’re blocking a specific shape, such as a shawl or sweater, use blocking mats or pins to stretch and shape it to the desired dimensions. Allow it to dry completely before removing the pins or mats.
8.2 Storage
Proper storage is crucial to protect your knitted items from damage, stretching, and pests.
Solution: Consider these tips for storing your knitted creations:
1. Clean before Storage: Ensure your knitted items are clean and fully dry before storing them. Dirt, oils, and moisture can attract pests and cause damage.
2. Fold Properly: Fold your items neatly to prevent excessive stretching. Avoid hanging knitted pieces, as this can lead to stretched-out shoulders or hanger marks.
3. Use Storage Bags or Containers: Store your knitted items in breathable storage bags or containers to protect them from dust, moths, and other pests. Avoid using plastic bags, as they can trap moisture.
4. Moth Prevention: To prevent moth damage, add natural moth deterrents, such as lavender sachets, cedar blocks, or mothballs, to your storage containers. Ensure these products do not come into direct contact with your knitted items.
5. Avoid Sunlight and Heat: Store your knitted items in a cool, dry place away from direct sunlight and heat sources, as they can fade colors and weaken the fibers.
8.3 Repairs and Maintenance
Over time, your knitted items may require repairs or maintenance to keep them in good condition.
Solution:** Here are some tips for repairs and maintenance:
1. Fixing Snags: If you notice a snag or loose yarn, use a crochet hook or a tapestry needle to pull the snagged stitch through to the wrong side of the fabric. Secure the loose ends by weaving them in.
2. Pilling Removal: Pilling occurs when short fibers tangle and form small balls on the fabric’s surface. Use a fabric shaver or a sweater stone to gently remove pills from your knitted items.
3. Regular Inspection: Regularly inspect your knitted items for signs of wear, such as thinning areas, stretched-out sections, or loose stitches. Address these issues promptly to prevent further damage.
4. Reblocking: If your item loses
its shape or stretches out over time, consider reblocking it to restore its original shape and dimensions.
By following these care guidelines, you can keep your knitted creations in excellent condition for years to come, ensuring that you can enjoy wearing or using them or even pass them down as treasured heirlooms.
FAQs
1. Can I machine wash all knitted items?
Not all knitted items are machine washable. Always refer to the care instructions on the yarn label or pattern to determine if the item can be machine washed or if it requires handwashing.
2. How often should I wash my knitted items?
The frequency of washing depends on several factors, such as how often the item is worn and its exposure to dirt and odors. As a general guideline, it’s best to wash knitted items when they become soiled or start to develop odors.
3. What should I do if my knitted item shrinks?
If your knitted item shrinks, it may be challenging to restore it to its original size. However, you can try soaking it in lukewarm water with hair conditioner to relax the fibers and gently stretch it back to shape. Be cautious and test a small area first to ensure it doesn’t cause further damage.
4. How can I remove wrinkles from my knitted items?
To remove wrinkles from your knitted items, you can try steaming them lightly using a garment steamer or by hanging them in a steamy bathroom. Avoid using direct heat, such as an iron, as it can damage the fibers.
5. Should I store my knitted items in airtight containers?
No, it’s best to store knitted items in breathable containers to prevent moisture build-up and allow air circulation. Airtight containers can trap moisture and create a breeding ground for mildew or mold.
9. Conclusion
Congratulations on taking the first steps into the world of knitting! With this comprehensive guide, you have the tools and knowledge to begin your knitting journey with confidence. Remember to be patient, embrace mistakes as learning opportunities, and enjoy the process of creating something beautiful with your own two hands. Now, grab your needles, choose your favorite yarn, and let your creativity soar as you embark on this rewarding and fulfilling craft.
FAQs
1. Is knitting difficult to learn for beginners?
Not at all! Knitting is a beginner-friendly craft that can be learned by anyone. With patience and practice, you’ll be creating beautiful knitted items in no time.
2. What type of needles should I start with as a beginner?
For beginners, it’s recommended to start with medium-sized straight knitting needles. They provide good grip and control while learning the basic stitches.
3. Can I learn knitting without a teacher?
Absolutely! There are many online resources, tutorials, and videos available that can guide you through the process of learning knitting step by step.
4. How long does it take to complete a knitting project?
The time to complete a knitting project varies depending on the complexity of the pattern and your knitting speed. Small projects like dishcloths can be completed in a few hours, while larger projects like sweaters may take several weeks.
5. What are some good knitting projects for beginners?
Aside from scarves and dishcloths, other beginner-friendly projects include hats, baby blankets, and simple shawls. These projects allow you to practice different stitches and techniques while creating useful items.
In conclusion, knitting is a fulfilling and creative craft that offers endless possibilities for self-expression. By following the suggestions and tips in this guide, you’ll be equipped with the knowledge and skills to get started with knitting. Embrace the journey, experiment with different patterns and techniques, and enjoy the process of transforming yarn into beautiful creations. Happy knitting!


