
How do I Make Unique and Personalized Photo Albums?
In a world awash with digital photos, there’s something uniquely special about holding a physical photo album in your hands. It’s a tangible piece of your memories, a cherished keepsake that can be passed down through generations. But how do you transform a simple photo album into something truly unique and personalized? That’s the question we’re here to answer in this comprehensive guide. Let’s get into: How do I Make Unique and Personalized Photo Albums?
The Importance of Personalized Photo Albums
Why go through the trouble of creating personalized photo albums when digital albums are readily available? Here’s why:
- Preserve Memories in Style: Personalized albums are an artful way to preserve your most cherished memories, making them more meaningful than a random assortment of pictures on your phone.
- Touch of Sentimentality: They add a touch of sentimentality to your photos, turning them into a storybook that can be passed down to your children and grandchildren.
- Creative Expression: Crafting personalized albums allows you to flex your creative muscles, turning each page into a canvas for your artistic expression.
Gathering Your Materials
So, How do I Make Unique and Personalized Photo Albums? Before you start assembling your personalized photo album, it’s essential to gather all the necessary materials and tools. Here’s a checklist to ensure you’re well-prepared:
Essential Materials
- Photo Prints: High-quality prints of the photos you want to include in your album.
- Album: Choose an album that suits your style, whether it’s a traditional leather-bound one or a modern, customizable binder.
- Adhesive: Acid-free photo adhesive or double-sided tape to affix your photos.
- Decorative Paper: Patterned or colored paper to add flair to your pages.
- Scissors and Paper Cutter: To trim photos and paper neatly.
- Pens and Markers: For labeling and adding captions.
- Ruler: To ensure straight lines and accurate placement.
- Embellishments: Stickers, ribbons, and other decorative items.
- Protective Sleeves: To shield your photos from dust and fingerprints.
Optional Materials
- Stencils and Stamps: For adding creative designs.
- Glitter and Glue: To add a touch of sparkle.
- Corner Punch: To give your photos rounded corners for a polished look.
- Page Protectors: For extra protection.
With your materials ready, it’s time to roll up your sleeves and start creating your personalized masterpiece.
Designing Your Layout
The layout of your photo album plays a pivotal role in its overall appeal. It’s like setting the stage for your memories to shine. Here are some layout ideas to consider:
1. Chronological Journey
Arrange your photos in chronological order to tell a visual story of a particular period in your life. This layout is perfect for capturing the progression of events, like a vacation or a child’s growth.
2. Thematic Bliss
Organize your album around a specific theme, such as weddings, birthdays, or travel adventures. This approach allows you to curate photos that evoke a particular emotion or capture a specific moment.
3. Collage Extravaganza
Create vibrant collages by arranging photos creatively on each page. This dynamic layout adds energy and variety to your album.
4. Minimalistic Elegance
For a sleek and sophisticated look, opt for a minimalist layout with one or two photos per page. This style works wonders for highlighting individual images.
5. Storybook Style
Craft a narrative by adding captions or journal entries alongside your photos. This style helps convey the backstory and emotions behind each image.
Remember, there’s no one-size-fits-all approach. Choose a layout that resonates with your personal style and the story you want to tell.
Capturing the Moments
Now that you’ve decided on the layout, it’s time to start adding your photos. This is where your creative juices truly flow.
Arranging Your Photos
- Start with a Centerpiece: Choose a standout photo for the first page, often representing the theme or event you’re capturing.
- Balanced Composition: Balance your images across pages, considering colors, sizes, and orientation for visual appeal.
- Add Variety: Mix up the types of photos you include – candid shots, portraits, and landscapes. This diversity keeps things engaging.
- Tell a Story: Place related photos together to create a narrative flow. For instance, if you’re documenting a road trip, group photos from each location.
- Don’t Overcrowd: Avoid overcrowding pages with too many photos. White space is your friend for a clean, elegant look.
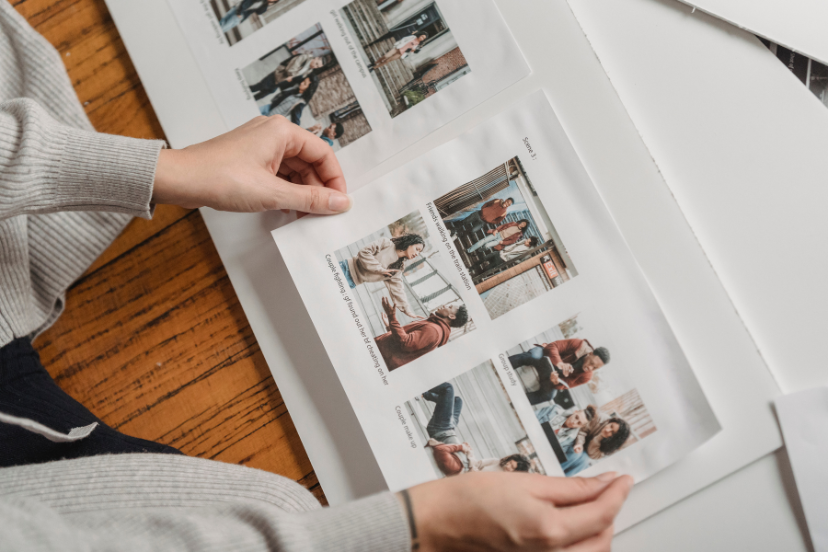
Captioning and Labeling
- Add Context: Write captions or labels to provide context and share your thoughts or feelings at that moment.
- Handwritten Charm: Consider handwriting captions for a personal touch, or use stylish fonts for a modern look.
- Dates and Places: Include dates and locations to create a timeline and a sense of place.
Crafting Creative Covers
The cover of your personalized photo album is the first thing people see, so make it count. Here are some ideas to craft a captivating cover:
- Custom Embossing: Personalize the cover by embossing your name, date, or a meaningful phrase.
- Photo Collage: Create a collage of your favorite photos from the album to give a sneak peek of what’s inside.
- Fabric Wrap: Use fabric like silk or linen to wrap the cover for a tactile, luxurious feel.
- Hand-Painted Design: If you’re artistically inclined, paint a design that represents the album’s theme.
FAQs About Personalized Photo Albums
1. What’s the best way to choose photos for my personalized album?
Choosing photos can be daunting, but start by selecting the ones that evoke strong emotions or tell a compelling story. From there, narrow down your selection based on your album’s theme or narrative.
2. How can I ensure my photos will last in the album?
To ensure the longevity of your photos, use acid-free adhesive, protective sleeves, and store your album in a cool, dry place away from direct sunlight and moisture.
3. Can I create a personalized photo album digitally?
Absolutely! There are many online services and software that allow you to design personalized photo albums digitally, which can then be professionally printed and bound.
4. What if I’m not particularly artistic?
No worries! There are countless templates, stickers, and embellishments available to help you add a creative flair to your album, even if you’re not artistically inclined.
5. Should I include text in my photo album?
Including text can add depth to your album by providing context and storytelling. Consider adding captions, quotes, or personal notes to enhance the narrative.
6. How do I choose the right album size?
The album size depends on your preference and the number of photos you want to include. Smaller albums are great for specific events,
while larger ones are ideal for comprehensive collections.
Conclusion: A Unique Treasure
Creating unique and personalized photo albums is a labor of love that rewards you with a tangible piece of your memories. From designing captivating layouts to crafting creative covers, every step is an opportunity to express yourself and relive your cherished moments.
So, gather your photos, unleash your creativity, and embark on the journey of crafting photo albums that will become treasured heirlooms, telling your story for generations to come.
In the digital age, these albums stand as a testament to the enduring power of physical keepsakes, reminding us that memories, when artfully curated, become timeless treasures. Now, go forth and create your masterpiece. Your unique and personalized photo album awaits.


